
A website launch checklist is a phased validation process, run in four stages: pre-launch setup, technical QA, a go-live runbook, and 72 hours of post-launch monitoring. Done right, it catches broken analytics, missing redirects, and indexing errors before they cost you traffic or leads. The outcome that matters most: your primary conversion action is tracked and firing before you ever touch DNS.
TL;DR:
- Confirm your primary conversion actions and ensure all relevant pages and URLs are correctly set up before launch to avoid revenue loss.
- Verify critical technical elements such as SSL certificates, robots.txt, sitemap.xml, canonical tags, and tracking codes are properly configured and functioning in real time.
- Conduct comprehensive performance, security, accessibility, and cross-browser tests using actual devices and real-world scenarios, not just emulators or automated tools.
- Build and test your redirect map before launch to prevent traffic loss from broken or misconfigured URLs with backlinks or search rankings.
- Monitor your site closely during the first 72 hours post-launch by checking analytics, crawl status, uptime, and error logs multiple times daily to catch silent failures early.
Table of Contents
- What Belongs on a Pre-Launch Website Checklist?
- Technical QA: The Tests That Catch What Breaks First
- Is Your Site Actually Indexable, and Is Tracking Live?
- The Launch-Day Runbook: What to Do, in Order
- What Should You Watch in the First 72 Hours After Launch?
- Who Owns Each Item, and Who Signs Off?
- How a Fast, Accountable Website Launch Actually Works
- What the Checklist Culture Gets Wrong
- Get a Launch Built by People Who Run This Checklist Daily
- Where to Go for Deeper Checklist Templates
- Sources
What Belongs on a Pre-Launch Website Checklist?
Most launch failures trace back to skipped pre-launch work, not bad luck. A pre-launch website checklist exists to force decisions and verifications you can't easily undo once the site goes public, and university IT departments that publish their own launch checklists consistently emphasize scheduling and assigned owners over ad hoc reviews. That structure matters more than any single item on the list.
Start with goals, not tasks. Before anyone touches a staging environment, write down the primary conversion action, whether that's a booking form, a phone call click, or a quote request, and identify every page that has to exist for that action to happen. A roofing company site with no working "Get a Free Estimate" button on launch day has technically shipped, but it hasn't launched anything that generates revenue.
From there, work through the following in order:
- Confirm the sitemap and URL structure. List every page going live, decide on the permalink pattern, and settle canonical rules before content gets loaded, not after. Changing URL patterns post-launch means redirect work you could have avoided.
- Lock down domain, DNS, hosting, and SSL. Verify the SSL certificate is valid and, critically, that auto-renew is switched on. A surprising number of sites go dark months after launch because a certificate lapsed and nobody was watching.
- Finish content production. Replace every placeholder image and "Lorem ipsum" block, proofread every page for spelling and grammar, and write unique meta titles, meta descriptions, and Open Graph tags for each key page.
- Publish legal pages. Your privacy policy, terms of service, and cookie or consent notice need to be live and linked in the footer, not stubbed out as "coming soon."
- Strip staging restrictions. Confirm the noindex tag and any robots rules used to hide the staging site are removed on the production build. This single step gets missed more often than any other on this list, and it can quietly keep your site out of Google for weeks.
- Take a final backup and write down the rollback plan. If something breaks after go-live, you want a documented path back to the last known-good state, not a scramble.
Here's a quick reference for what typically needs sign-off before you move to technical QA:
| Item | Typical owner | Verification evidence |
|---|---|---|
| Primary conversion path defined | Marketing lead | Written goal + tracked page list |
| Domain, hosting, SSL configured | Developer | Certificate expiration screenshot |
| Content finalized and proofread | Content owner | Proofread copy in CMS, no placeholders |
| Privacy policy, terms, cookie notice | Legal or founder | Live URLs linked in footer |
| Staging noindex removed | Developer | robots.txt and meta tag check on production |
| Final backup taken | Developer | Backup file timestamp and location |
University communications teams that run their own pre-launch checklists treat accessibility and compliance review as required gates, not optional polish. That's worth borrowing regardless of your site's size. Skipping accessibility now almost always means retrofitting it later, at a higher cost.
Pro Tip: Keep a shared document where every owner pastes a screenshot or link as proof of completion. "I think it's done" is not the same as "here's the evidence it's done," and that difference gets exposed fast during a rollback.
If you're replacing an existing site, add one more non-negotiable step: build your 301 redirect map before launch day, not during it. Every old URL with backlinks, bookmarks, or search rankings needs a mapped destination, or you'll bleed traffic the moment the new site goes live.
Technical QA: The Tests That Catch What Breaks First
Technical QA is where a checklist for launching a website earns its keep. This is the stage where you stop trusting that things work and start proving it, ideally using the same technical lanes engineering-focused guides recommend: performance, security, SEO, and analytics, each with a named owner so nothing gets assumed to be someone else's job, a pattern Netguru's pre-launch guide documents in detail.
Performance first. Run Lighthouse or Lighthouse CI against your actual templates, not just the homepage, since a fast homepage tells you nothing about how your product or service pages behave. Set acceptance thresholds for Largest Contentful Paint, Cumulative Layout Shift, and Interaction to Next Paint (the three Core Web Vitals metrics Google uses), and don't call performance "done" until representative pages clear those thresholds. Check image compression, caching rules, CDN configuration, and Time to First Byte on a handful of real pages, not a single test case.
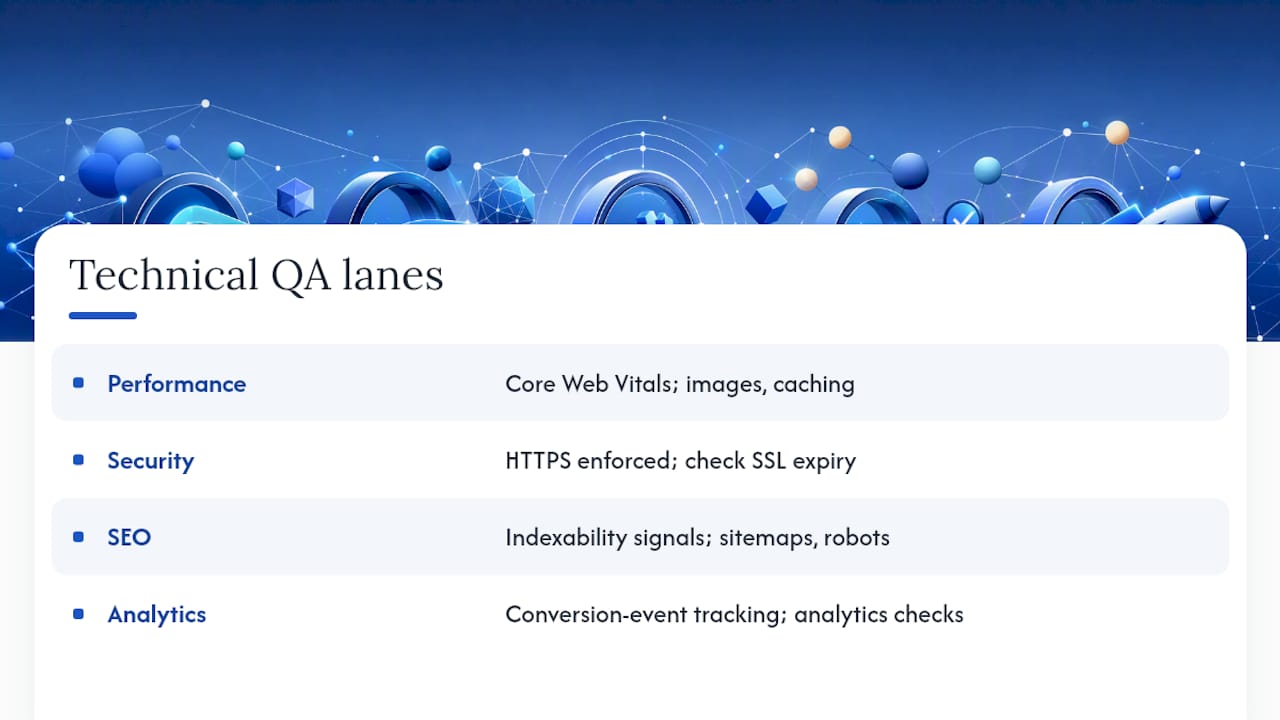
Security basics, checked, not assumed. Confirm HTTPS is enforced sitewide, verify your SSL certificate's expiration date, and scan for mixed-content warnings, which happen when a secure page loads an insecure resource and silently breaks the padlock icon. Run basic checks against the OWASP top web application risks and confirm security headers like Content-Security-Policy and X-Frame-Options are configured, even minimally.
Accessibility spot checks. You don't need a full audit before launch, but you do need to verify color contrast ratios, keyboard navigation through your primary conversion path, and that ARIA landmarks exist where screen readers need them. A useful breakdown of accessible color contrast covers quick tests you can run in minutes with free browser tools.
Cross-browser and real-device testing. Emulators are a starting point, not a substitute. Test on an actual iPhone and an actual Android device, check your critical breakpoints (usually around 375px, 768px, and 1024px wide), and confirm nothing collapses or overlaps at the in-between sizes most emulators skip.
Click everything. Submit everything. Walk every internal link and confirm it resolves. Then submit every form, including deliberately bad input: an email with no "@" symbol, a phone field with letters, a required field left blank. Broken form validation on launch day is one of the most common, and most preventable, failures on any site launch checklist.
One statistic worth sitting with: a QA-focused audit of newly launched sites found that analytics and event tracking were among the most commonly broken elements at launch, more often than visible layout bugs. That's the trap. A broken button is obvious within minutes. A broken conversion event can go unnoticed for weeks, quietly erasing your ability to prove the site is working at all.
For a practical example of what a full technical QA pass looks like end to end, a detailed website audit example walks through cross-browser, mobile, and performance checks on a live project.
Pro Tip: Never trust that a tag "loaded." Open your browser's network tab, filter for your analytics domain, and watch the actual request fire when you click a form's submit button. That five-second check catches more launch-day failures than any dashboard will.
Is Your Site Actually Indexable, and Is Tracking Live?
Two things sink more launches than bad design ever will: a robots.txt file that accidentally blocks the whole site, and an analytics setup that looks installed but never fires a real event.
Run through this order on launch day itself:
- Audit robots.txt line by line. Confirm there's no leftover
Disallow: /from the staging environment. This one line, copied forward by accident, has quietly killed more site launches than almost any other single error. - Publish sitemap.xml and submit it to Search Console immediately. Guides on launch procedure consistently recommend submitting the sitemap the moment the site goes live, since it accelerates how quickly Search Console discovers and crawls your new pages, per checklist guidance from InMotion Hosting.
- Validate canonical tags and structured data. Run key pages through Google's Rich Results Test and confirm each page's canonical tag points to itself, not to a staging domain or an old URL pattern.
- Verify GA4 and Tag Manager installation on the live URL, not staging. Trigger your primary conversion event and confirm it appears in GA4's DebugView in real time. If it doesn't show up there, it isn't tracking, no matter how the code looks.
- Test consent banner behavior. If you're gating tracking behind cookie consent, confirm no analytics requests fire before a visitor accepts. This is both a compliance requirement and a data-accuracy one.
- Test every 301 redirect and check for chains. A redirect that bounces through three hops before landing on the final URL wastes crawl budget and slows the page down. Fix chains before launch, not after Search Console flags them.
Checklist resources built around avoiding the most common five failure points also flag missing analytics and legal pages as recurring launch-day gaps, right alongside the accidental noindex problem above. Search Console ownership verification deserves its own line item too: confirm you've verified the exact host you're launching on, www versus no-win, since a mismatch there means your sitemap submission goes nowhere useful.
- Robots.txt reviewed for accidental blocks
- Sitemap.xml submitted to Search Console
- Canonical tags validated on key templates
- GA4 events confirmed firing in DebugView
- Consent gating tested before and after acceptance
- Redirect map tested for chains and dead ends
The Launch-Day Runbook: What to Do, in Order
A launch-day runbook isn't a checklist you check off in any order. It's sequenced, because doing step four before step two can undo step one. Comprehensive checklist guides that break launches into phases consistently place this runbook as its own distinct stage, separate from technical QA, and for good reason: pre-launch foundation work and go-live execution require different mindsets.
- Take one final full backup. Confirm the rollback procedure is written down somewhere everyone on the team can find without asking you.
- Turn off maintenance mode or the coming-soon page. Clear every layer of cache, including CDN cache, and load the homepage in a private browser window to confirm what a stranger actually sees.
- Recheck HTTPS, robots.txt, and sitemap accessibility on the live domain. These checks happened in staging already, but staging and production are never guaranteed to match exactly.
- Submit the sitemap and confirm Search Console ownership for the exact host you're now live on.
- Run your conversion path end to end, on the live domain, using a real device. Submit the contact form. Click "Call Now." Confirm the confirmation email or notification actually arrives.
- Keep your team reachable. Set a window, typically two to four hours, where the developer, the content owner, and whoever owns analytics are all available if something breaks.
For complex builds involving multiple environments or staged rollouts, deployment-specific guidance like Parent Technology's deployment guide offers useful patterns for keeping rollback options open during a release window, even outside its specific platform focus.
Pro Tip: Launch during a low-traffic window, but never launch when your team is unreachable. A Friday-at-5-PM launch with everyone logging off afterward is how a small bug turns into a weekend-long outage.
What Should You Watch in the First 72 Hours After Launch?
The first 72 hours decide whether small problems stay small. Staged launch guidance that maps out a full week before and after go-live treats active first-week monitoring as a distinct, required phase, not an afterthought once the site is "done."
Check these multiple times a day, not once at the end of day one:
- Analytics dashboards for missing or dropped events
- Search Console for crawl errors or sudden indexing anomalies
- Uptime monitoring alerts
- Error-rate spikes in server or application logs
- Real user monitoring data for performance regressions on live traffic
When something goes wrong, triage by severity. Tracking failures and payment or form errors jump the queue ahead of a misaligned button or a typo, because those failures cost you data and revenue silently while a visual bug is at least visible to you.
- Run a daily team briefing for the first three days, even if it's five minutes.
- Log every incident, however small, with what broke and what fixed it.
- Taper monitoring frequency once 72 hours pass without a major issue, moving from hourly checks to daily ones.
Pro Tip: Treat "no data" as a red flag, not a quiet day. A sudden silence in your analytics dashboard almost always means tracking broke, not that nobody visited your site.
Who Owns Each Item, and Who Signs Off?
A checklist without named owners turns into a list nobody's responsible for. The pattern worth adopting: every item gets one owner, one verifier where the risk warrants it, and one final approver with the authority to delay the launch if evidence is missing.
- Assign a named owner to every single line item, not a team or department.
- Require a verification artifact: a screenshot, a DebugView capture, a successful test-form submission, something concrete.
- Name one final approver whose sign-off is required before DNS cutover happens.
- Define a content freeze window before launch and set clear rollback triggers in advance, not in the moment.
Requiring an evidence artifact per item, rather than a verbal "yes, it's ready," measurably reduces the odds of a critical item slipping through unchecked. A well-structured website review checklist is built around exactly this owner-and-evidence structure.
Pro Tip: Give your final approver explicit permission to say "not yet." Without that, sign-off becomes a formality instead of an actual gate, and formalities don't catch missing SSL certificates.
How a Fast, Accountable Website Launch Actually Works
Speed and rigor aren't opposites if the checklist is structured right. A 3 to 7 day launch is realistic when work runs in parallel lanes, design, content, and technical setup moving simultaneously, rather than one long sequential chain where each step waits on the last.
Certain checks never get compressed, regardless of timeline: analytics verification, redirect mapping, and SSL configuration are hard stops, confirmed working before go-live, full stop. What can be staged is deeper accessibility auditing or secondary content polish, items that improve the site without blocking its core function on day one.
- Parallel lanes: design and content build alongside domain, hosting, and analytics setup.
- Hard stops that never get skipped: SSL, redirects, and conversion tracking.
- Items safely staged for week two: deeper accessibility passes, secondary page content.
- Typical business targets: mobile clarity, a working lead flow, and local search visibility from day one.
That combination, mobile-first layouts, a clear path from visitor to inquiry, and Google Business alignment, reflects what most local service businesses actually need on launch day more than they need a flawless 100-page site. Forge-web-studio's website process overview outlines how these lanes run concurrently on a compressed timeline.
Pro Tip: Compressed timelines fail when analytics gets treated as a "we'll add it later" item. Build tracking into the build itself, not as a bolt-on the week after launch.
What the Checklist Culture Gets Wrong
Most launch checklists treat every item as equally urgent, and that's the mistake. A missing favicon and a broken conversion event both show up as unchecked boxes, but they are not remotely the same risk. The checklist habit that actually protects a launch isn't having 80 line items. It's ranking them by what silently costs you money versus what's cosmetic.
The conventional advice leans hard on pre-launch perfectionism: polish every page, test every browser, proofread every word, then flip the switch and walk away. That's backwards. The riskiest hours of any launch are the first 72 after go-live, not the weeks before it, because that's when real traffic hits systems that were only ever tested with fake data. A checklist that front-loads all its rigor into pre-launch and treats monitoring as an afterthought is optimizing for the wrong phase.
If you take one thing from this, prioritize analytics verification above almost everything else on the list. A gorgeous site with broken tracking is a site you're flying blind on, and you won't know it's blind until you've already lost a week of data you can never recover. Ownership matters too, but ownership without evidence is just an assumption with someone's name attached to it.
— Dylan
Get a Launch Built by People Who Run This Checklist Daily
This exact phased checklist is run on many projects, which can result in a full site build shipping in as little as 3 days to a week without cutting corners on analytics, SSL, or redirect mapping.
Every build starts mobile-first, with a clear conversion path (call button, quote form, booking flow) and local search setup baked in from the start, not bolted on after the fact. That's the gap most Texas service businesses hit with a DIY build or an agency working on a slower timeline: by the time tracking and local SEO get attention, the launch window has already passed and the data gap is permanent. Forge-web-studio's responsive website development service handles the entire phased checklist for you, from pre-launch setup through the first 72 hours of monitoring. If you're planning a launch or a redesign and want it handled end to end, start your website project and get a scoped timeline back within days.
Where to Go for Deeper Checklist Templates
- CU Denver's launch checklist covers scheduling and staging-rule governance in more detail.
- Brown University's pre-launch checklist walks through compliance and accessibility gates.
- Elementor's phased launch guide breaks the full process into foundation, build, test, and monitor stages.
- Netguru's pre-launch guide organizes checks by technical lane with named owners.
- Forge-web-studio's website review checklist is a practical template you can adapt directly for your own launch.
Sources
- Launch Checklist - CU Denver
- Website Pre-Launch Checklist | University Communications Digital
- Web development checklist: The complete pre-launch guide
- Website QA checklist before launch, ordered by what actually breaks